GUEST POST – How I teach… The development gap @RobboGeog

**Following some positive noises on Twitter, delighted to return to #HowITeachGeog! This post is provided by the brilliant @RobboGeog – go and find her on Twitter – who got the writing bug and shared this over. Love it! 

Tackling a sensitive and interesting issue here – I think Hina does a great job in unpacking some of the issues and challenges around this topic. Let us know your thoughts #geographyteacher!**

The development gap is one of my favourite topics to teach. It is a really important basis for so many other aspects of geography, including country studies. In the current climate it is important for students to understand where some of the issues might originate from. 

The starting point is to understand what the gap is. This can be made more difficult if you are teaching in an area that is not ethnically diverse or if students have not been outside of Europe. However it does need to be done in a way that does not embed stereotypes. 

I start with some cartoons to generate discussions. Sometimes these can highlight stereotypes or make generalisations but that is OK as that is something that can be looked at. If it doesn’t come up naturally then it can be done through careful questioning. In one class the cartoon on the left got one girl (with a Nigerian background) particularly angry when she first looked at it as she felt it was a sweeping generalisation of all African countries. It was very important that this was brought up.

HinaR1

HinaR2

We then talk about how we define countries at different ends of the gap, moving away from the basic rich/poor. To visualise life at different levels (something which many students will not have seen personally) I use website such as Dollar Street and the link below:

https://www.theguardian.com/society/gallery/2014/jun/05/portraits-of-people-living-on-a-dollar-a-day-in-pictures

The key stage you are teaching at may determine the language you use. At key stage 3 I use Hans Rosling’s 4 levels. However at GCSE you may need to stick with the language that the board uses (for example AQA uses HIC/LIC/NEE). 

Terminology is key as there are many terms used in this topic – some of which we assume students already know. So I will get students to create a glossary as we go – of mainly level 3 vocabulary but there will be some level 2 vocabulary that needs to be defined as well.

We look at the categories that the causes of the development gap can fall into – historical, environmental and socio-economic. There should not be an assumption that all students will remember these from using them previously so it best to define these. 

I will start with the historical and the key factor of colonialisation. Being a British East African Asian myself this is an easy one for me to talk about. Geography teachers need to have the knowledge of what happened and its impacts, which I hope they would be. However with a rising number of non-specialists teaching the subject, especially at key stage 3, subject leads must not assume that they have the same knowledge. 

The term colonialisation is likely to be unfamiliar with students though they may have heard of the British Empire or the Commonwealth – but do they know what these actually mean? I do not assume that they do – an explanation is needed (they may not have studied this in history yet). A map is useful here – as is showing that other countries also had their own empires and had the same impacts. Students need to know why countries colonised others and how they were able to in order to understand why this led to the development gap. This can be tricky if you have students from with an ethnic background originating from a Commonwealth country as they can be quite passionate about it. I find it best to utilise them and get them to give their point of view to be discussed. Colonisation led to countries being stripped of their resources for the gain of the colonising countries, in some cases this included people being made into slaves. When countries gained independence many of them struggled to decide who was going to run the country which led to civil wars and dictatorships in many cases. It is important to let students digest this and take questions – make links to areas already studied but also those they will be studying. 

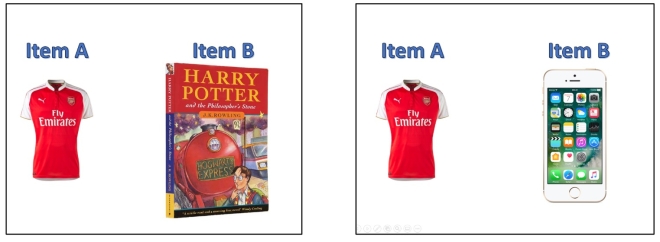
Environmental causes are easier to explain as they are not as controversial. I use pictures to get students to think of some ideas themselves, for example:

HinaR3
Landlocked countries of the world – Wikimedia commons
HinaR4
Development can be limited by environmental factors too.

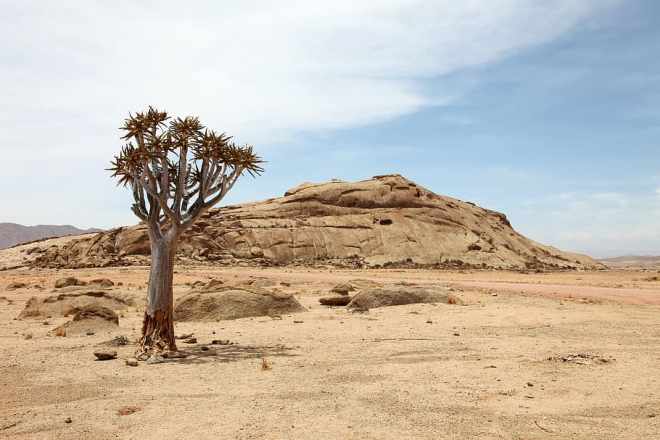
Students think of geographical questions to ask about the pictures and their link to development – higher ability students will be expected to draw on knowledge gained from previous topics studied (so showing synoptic links). They need to be clearly taught the impact of the different environmental factors. For example a country being susceptible to climate and/or tectonic hazards will struggle to develop as it may lose its crops and therefore income on a regular basis, therefore not have the money to spend on services and improving quality of life (this is a basic explanation). The key here is to ensure a sequenced explanation; i.e. what the environmental factor leads to. There is also the point that there is rarely a stand-alone cause – usually there are few causes linked together. Higher ability students will be expected to link these together.

Socio-economic causes can cover a variety of factors, for example war, trade and the poverty trap. Again sequencing is important here. This is another area where an assumption must not be made – students will not necessarily know how trade works so an explanation of this is necessary, maybe through a short YouTube clip (I still think there is a value to the trading game if run properly). The poverty trap really helps students to understand that is not the fault of the people caught in it; they are not lazy and relying on help. Misconceptions must be challenged and pre-empted. 

Stonemasons

I vividly remember visiting Barcelona and seeing the magnificent Basílica de la Sagrada Família. To my shame (I was only in Year 10…) I knew nothing of the mighty cathedral and its fascinating history before visiting. Construction began in 1882, progressing under the guidance of a number of different architects (Gaudí himself even headed up the project until his death in 1926!), into the present day. There is hope the Basilica will be completed by 2026 – the centenary of Gaudi’s death.

What struck me about the Sagrada Família, amongst many things, was the care and attention taken by the hundreds who have worked on it over its time of construction. Stonemasons on the highest skill who – even now, supported by modern technologies – are master of their craft, taking the greatest care and attention to the finest details of the construction. But it was not only this that struck me – it was the idea that, for some of these stonemasons, they would never see the project to completion. They would spend their working lifetime (or, in some cases, their entire life) participating in the raising of this wonderful structure, and never bask in its awesome presence on the Barcelona skyline. The idea that, you could play your part, and take no credit in the glory of the final product, seemed entirely bizarre to my 15 year old self.

And yet, I became a teacher.

Anyone who works in a school must adopt the mindset of the stonemasons of the Sagrada Família. We must understand that, through every action and interaction in our schools, we are building towards something great. We must treat our schools and staff with the same level of respect and admiration as the stonemasons of Barcelona’s iconic cathedral. Teachers deserve the time, space and support to develop into the best practitioners they can be – after all, the results of that will be truly transformative.

Martyn Oliver (CEO of OGAT) put it best – “We must aspire for our schools to become cathedrals in the community”. This captures, perfectly, the sentiment of our work. We may not be there to see end result – the beautiful cathedral, the inspiring and hopeful space – but we must treat that end goal as our reason and purpose. We must be careful and patient in our work – realising the role we play in achieving this great collective aim, seeking to lift those who are to come – not seeing it as a hopeless task.

Schools, and leaders, must look to their teachers as these stonemasons. Make sure the conditions of work are as good as they can be – behaviour is right, staff are trusted, staff are trained, get the curriculum right – and you will start building the cathedral.

GUEST POST – How I teach… The first steps of the NEA @theislandgeogr

**To my shame, it’s only been in the last year I’ve come across Chloë in the Twittersphere and, if you don’t follow, her twitter page and her work (available at https://www.theislandgeographer.co.uk/) is absolutely essential for any geography teacher. Huge, huge thanks to Chloë for her contribution to the ongoing ‘How I Teach…’ series. This latest one, on the NEA, has been hugely illuminating on a personal level – having never taught A Level before!**

How I teach… the first steps of the NEA

I realised quite early on in my delivery of the NEA both as a classroom teacher and as an independent field tutor that I wasn’t spending enough time in the early stages outlining my expectations, going through the organisation and logistics of the unit and highlighting to students what it really means to be an independent researcher. I have effectively doubled the amount of time I have spent on this stage of the NEA, which still feels quite indulgent given how tight the course is, but for the most part I now have students who are a lot more confident and can work with a greater degree of independence – and I get the time back many times over in the later stages of the planning and write up as they need far less input from me. Here’s how I deliver those first stages of the NEA. In total it is probably about four hours of contact time and as you might expect with this type of ‘lesson’ it is very much teacher-led and quite ‘talky’.

I start with an introduction to what the NEA is by highlighting its purpose. I try not to make this too utilitarian by avoiding discussing the idea that it is a requirement of their A Level or how it can help their UCAS applications. However, it depends on the cohort and how they best engage with learning in general as to how I pitch this. Instead I focus on the depth of skills they can develop, the way it simulates higher, university level, research and the chance it gives them to really explore a part of geography that interests them. I reinforce this point by using quotes from students in previous cohorts about how they found the NEA to be a positive experience.

I then talk through the different stages of the NEA write up in quite a simplistic manner – no more than just a series of page titles on a handout at this point – so they can see how the whole thing will hang together and what the final ‘product’ might look like. I compare the NEA to other fieldwork ‘write ups’ they have done in previous key stages and highlight how the step-up to A Level requires greater depth of research and most importantly, a heightened sense of justification and self-critique at each stage.

NEA

Then I tackle the idea of independent working and what this will mean for them. I start by discussing what level of support is available to them for each part of the NEA process and I use this image on a handout (above, adapted from Simon Oakes), for them to refer to. I highlight just how much of the NEA falls in the independent section and this leads us to discuss what it means to work independently.

It is worth remembering that independent research, at this level, is probably going to be completely new for the students, so we shouldn’t skip over this aspect and assume that they know how to be independent. I highlight the positive aspects of being able to control the study’s direction and have ownership of something as interesting as their own research. From this point on I try to semantically advance the process they are undertaking – referring to the project as ‘their research’ rather than the more passive ‘NEA’. With this kind of subtle intervention, it tends to hit home a little sooner that they are in control of their project and that I am very much on the side-lines and unable, for the most part, to hold their hand through it.

Depending on the cohort, I may also actually teach independent working skills – defining how an independent researcher reads, how they view their work, how they manage their expectations etc. I have used exercises such as this statement sort to emphasise these ideas.

The next stage is for me to introduce a research diary. I insist that students use this tool to scaffold their reading and observations and record the way their thoughts have progressed through the research process. If a student requests a one-to-one session with me to discuss their NEA, the first thing I ask for is their research diary so that I can see how they have tried to tackle any issues on their own first before consulting me. Depending on need, I may make comments about the quality of their research and advise them on the possible direction of their future research.

Then I let the students loose on their secondary research about the fieldwork location. To begin with I make this quite structured and scaffold the classwork and homework times to cover very specific aspects of the fieldwork location that I want them to understand in order for them to be able to formulate any kind of working title or research questions. This scaffolding starts with quite open observations from different sources and ends with the requirement for actual quantitative data and known geographical theories and models that apply to these real-world observations. As the students are carrying out their research, I ask them to critique the information they find and get them used to thinking critically about sources of data and the nature of her data itself – all things they record in their research diary as they are reading.

I then ask students to identify a general area of study, linked to the awarding body specification, that interests them. Using their research diary, I then ask them to identify interesting ideas, observations or gaps in the research as well as meaningful geographical links between different things they have recorded. From this they then formulate a minimum of ten research questions (which are much later whittled down to a more manageable number), using a question word grid for guidance and inspiration. For each they must justify why it has been included in the list and what makes it a good research question. I take this in as a piece of work and give an appropriate amount of written feedback.

Following this feedback, we discuss in more detail the constraints of their fieldwork – the time frame, the number of people who may be able to help in the data collection, the equipment and template ArcGIS layers they may have available to them, the importance of risk assessment and management etc. From here I ask the students to write a research proposal with what is strictly a working title, (I encourage them to change these as their research progresses and becomes more focused) which they verbally present to me and a panel (including one non-geographer if possible). At this stage I have no interest in their methodology but I would expect students to be able to begin to discuss the nature of the data they intend to collect in the field. Verbal feedback from the panel should be noted by the student, allowing them to edit their research proposal.

From here, (and possibly the subject of a future ‘How I teach…’) I introduce students to the nature of data itself as well as sampling techniques and more creative data collection methods.

GUEST POST – How I teach… Globalisation (A-Level focus) – @MrBishopGeog

**This was a really lovely piece of writing to edit. (Edit is a tad strong mind, didn’t have much to do!) I love Ben’s clarity of thought in presenting his ideas and taking us, step by step, through the planning. Also, reification, blew my mind a little… Enjoy!**

I recently attended a fantastic lecture on globalisation and migration, it made me reflect on how I introduce the concept of Globalisation at A-level. To capture this moment, I decided to have a go at one of Tom’s ‘How I teach’. Please bear in mind that I haven’t yet taught this so it is more a ‘How I plan to teach…’. 

Globalisation

Recapping

All students will have covered globalisation at GCSE and will have a good grasp of the basic concepts. I plan to show students a picture like the one below with the question ‘How would you define globalisation?’. 

I would expect students to talk about increasing links, whether through trade, technology or people and I might expect some students to talk about space time compression. I then plan to stretch their understanding a little further with some guiding questions:

  1. What is globalisation?
  2. What drives globalisation?
  3. What is being globalised?
  4. Who carries it out?

Although students at the start of their A-Level should have some understanding of these questions, they also provide a hint that there may be more to globalisation than we delve into at GCSE level. I hope to encourage students to be creative with their answers to these questions, e.g. one could argue that greed drives globalisation. I also will guide students to think about how their answers might differ according to who might answer them.

Evidence of globalisation

Using an article on the belt and road initiative we explore the concept further. 

Through this article I want to encourage the students to move away from the assumption that globalisation is something that is relatively new, but also that it is something that the ‘West does to the rest of the world’. 

The article helps to flesh out some of the answers to the guiding questions that were introduced with the picture and will also help them to move away from generalisations towards using more concrete examples. 

To build on this a little more I plan to give students the following map. Again we revert to the key questions at the start of the lesson, but we also introduce the idea of ‘why this map might be significant’, so thinking about the impacts that globalisation might have. I would expect students to suggest ideas about increasing competition, cultural shifts, movement of people and goods.

china.png

Deepening thinking

As we have touched on the impacts of globalisation, I now want to introduce the idea of ‘Reification’. In the lecture I attended, this concept really challenged my own thinking. For those like me who don’t know what it is, reification is when we treat something immaterial as a material thing. Often when I discuss globalisation with classes I would say “globalisation causes…” but does it? Globalisation is a concept, and is invariably driven by our choices as human beings, so to say “globalisation causes” appears to take away responsibility from our own choices. The reason I want to introduce this at the start of the globalisation topic is so that students have this in their minds throughout all of the areas that we cover. 

Measuring globalisation

Finally we tackle the idea of how we measure globalisation. Having established a definition and thought about some of our guiding questions which introduce globalisation, students should be able to put suggest ways in which we could measure globalisation. This not only reinforces their understanding of globalisation but also starts to get them to question what is measurable and what is more abstract within the concept of globalisation. 

Once we have had an initial discussion on measuring globalisation I will use the table below (based on the KOF index weighting – a completed one is below), as a basis of structuring their suggestions, encouraging them to fit their suggestions into the different categories and perhaps pointing them in the direction of factors that they hadn’t yet considered. 

Your ideas:
Economic Globalisation Actual flows
Restrictions to flows
Social Globalisation Personal contact
Information flows
Cultural Proximity
Political Globalisation

Globalisation 2

Next lesson they will be looking at the KOF index and AT Kearney, so I would set them a preparation piece to investigate one of these:

  1. What is it?
  2. How does it work?
  3. How does it help measure globalisation?
  4. Why might some people critique this?

I think it is important for the students to understand that we can measure globalisation so that we can then discuss how globalisation has accelerated. I have found that previously my lessons on the acceleration of globalisation didn’t really have much depth to them except in looking for evidence from graphs etc. Analysing the KOF index for example will allow students a more concrete way of analysing the growth in globalisation over time.

I am aware that I have not taught this lesson, yet, so it may not work as planned, but I hope that it will help others to reflect on how they introduce globalisation at A-level. (Too humble Ben, a wonderful piece!)

GUEST POST – How I teach… taxes – @Geo_Jo26*

This edition of #HowIteach is kindly provided by the wonderful @Geo_Jo26 and talks through how she teaches the deceptively difficult idea of taxes… Rich in examples and handy advice, this is a wonderful post for teachers old and new. Enjoy! 

Taxes

This lesson comes at about lesson 6 or 7 in a Development SOW.  I use it to explain and contextualise the differences in development between places and within places.  The students would already have learnt about development indicators (birth rate, fertility rate etc.) and explored Hans Roslings ‘Factfulness’, but now they need to understand the complexities of formal employment, informal employment, self-employed (which usually comes up in discussion) and how and why governments use taxes to develop a place. 
This is taught in KS3 Year 9.

I start with a simple retrieval activity to check knowledge and understanding of employment sectors and industry types, using concrete examples of products that the students can relate to.  This is a simple hands-up activity and I have to check first they know their right hand from their left hand.

Taxes 1

Taxes 2

We then quickly explore the incomes of the people producing the products and discuss why some are paid more or less than others for having different skills.  What constitutes a ‘skill’ is also an interesting discussion point.

Taxes 3

Taxes 4

We then have a brief introduction to VAT and discuss how, even though they aren’t ‘tax payers’, they do pay tax.

Taxes 5

Now the students need to learn why we pay taxes and what the government do with the money once they have it.

Taxes 6

In the past, I had just given them a set of keywords, both new and old, without icons, but with excellent advice from @olicav and @ThatBenRanson next time I will being including icons (if I can find something suitable) and contextual sentences to create a matching activity to really get them thinking.

Now we get to the main crux of the knowledge and understanding I want them to have.

They have a blank outline worksheet with the boxes and arrows on but no icons and no text.  I use the ‘I, WE, YOU’ process as much as possible when introducing new knowledge and have found this works particularly well when introducing very new learning.

Each text box and icon pop in whilst I explain and give examples, checking and questioning each time for understanding of specialist terminology (slow teaching). Arrows pop in once I have questioned students as to ‘what happens next?’.

Taxes 7

taxes-8.png

Taxes 9

There is often lots of questioning from the students at each point in this learning process, e.g. ‘what about self-employed people?’, ‘does this mean you are kind of paying your own wages?’, ‘so when you say ‘don’t touch MY blinds’, they really are kind of YOUR blinds’ or ‘what about those people that are supposed to pay tax but don’t?’ and this can easily take more than an hour.  This then gives even more time for retrieval, such as naming different types of jobs in each employment sector and examining tax fraud or corruption, and allows a freedom of their knowledge and learning to be shown.

At the end of this learning process students will not only have a knowledge and understanding of how places develop, different types of taxation, albeit at a basic level, employees rights, how tax and businesses create development, what the government does with our taxes, but also how lack of taxes and formal employment and employees rights lead to places struggling to develop.

I then follow this up by using a Case Study to look at the advantages and disadvantages for different groups of people of a TNC locating in a developing country.

My final question usually goes something like ‘Although you might moan about the taxes you have to pay, now and in the future, will you ensure you pay them?’.

How I teach… Global Atmospheric Circulation Model

*NOTE – This does not reflect an hour, or any other convenient package of learning, but is instead an overview of how I would go about unfolding this concept. The amount of time taken depends on a huge number of other factors!*

A recurring theme within the #geographyteacher community on Twitter is about how to teach the global atmospheric circulation model. The model seems to strike fear into the hearts of teacher, and students, alike. I confess, I felt exactly the same the first time I taught it. Now, it is right up there as one of my absolute favourite topics to teach.

Here it is:

Global-Atmospheric-Circulation
Image accessed via: https://www.internetgeography.net/topics/what-is-global-atmospheric-circulation/ (Sunday 10th November, 2019, 9:10am)

At first glance, it looks intense. I certainly don’t begin with the image you see above. There is just too much going on and students quickly become overwhelmed by it all.

In teaching about this, I want my students to be able to:

  • Confidently define latitude and identify how it changes, this will help them too…
  • Understand the process of differential heating, which will inform their understanding of…
  • The difference between high and low air pressure, when they know this they can…
  • Explain the weather conditions associated with different types of air pressure, which will mean they can determine
  • How the circulation of air changes around the world – taking the form of cells

Key idea –  Understanding latitude

To begin with, we recap what is meant by latitude. This takes the form of me working at the whiteboard (don’t have a visualiser :() and sketching an outline of the Earth.  I discuss with students that the Equator is at 0 degrees – dividing the world into two equal hemispheres, Southern and Northern. As we go away (North or South) from the equator, the latitude increases. This concept can prove tricky for some and I will do some quick questions to check we’re all clear.

GACM - Latitude check
Gradually introduce questions to check: Which letter is at the highest latitude? A or B? Explain why. Which letter is at the highest latitude? B or C? Explain why. How do you know A is at a low latitude?

Key idea – Differential heating

Assuming I am happy with students understanding of latitude at this point, we would now move onto consider the impacts of uneven insolation across the surface of the Earth. Addressing my class, I would explain that the sun’s rays do not heat the surface of the Earth evenly, resulting in differential heating. This is due to the curvature of the Earth. I would model this to students on the diagram:

GACM - Insolation
Advantages of a lined pad – makes sure my sun’s rays are equal. Students can see the impact of the Earth’s curve on the spread of insolation.

Now that we have an understanding of latitude and differential heating, I pose a question to my class; ‘At the equator, where the insolation is most concentrated, what happens to the air?’. The key here is ensuring I make my answer and explanation clear and concise: At the equator, where the sun’s rays are most concentrated air is warmed because of the higher surface temperatures and begins to rise, as it is less dense than the surrounding air. In reviewing this statement, I may ask a series of probing follow up Q’s – e.g. just remind me why is the insolation most concentrated at the equator? OR Why would the surface temperature be higher at the equator than at higher latitudes? – Ensuring we plan these follow up questions is a really important in consolidating our students understanding, don’t neglect them. 

Now that we are happy we have a) an understanding of latitude, b) an understanding of differential heating across the Earth and c) an emerging familiarity with the notion of rising air at the equator, we can start continue.

Key idea – Air pressure

I may now re-purpose my diagram to allow me to add the rising air at the equator. I explain that the rising air is made up of large amounts of water vapour, because evaporation over the oceans is high at the equator – remember differential heating.

GACM - Rising air
Have modified/added a new diagram to reduce distraction and allow students to focus on air pressure and movement.

As the air rises, I explain that it begins to cool because it is no longer heated by its contact with the warm Earth’s surface. As it cools, the water vapour in the air begins to condense (some students have a comfortable understanding of what is meant by condensation and others do not). Condensation results in the formation of large clouds over the equator  which, in turn, results in high levels of rainfall at the equator (link to rainforests, depending on your curriculum sequence!).

I teach students that this rising air is known as low pressure. I explain that we measure the ‘amount’ of air at the surface (in millbars) as it is a useful indicator of wider weather conditions. When teaching air pressure, it is well worth investing the time in getting students clear on the differences – low pressure = rising air, there is less air at the surface and high pressure = sinking air, there is more air at the surface. This can often be a stumbling block for many students. Use what’s out the window here too – if it’s raining, ask students about air pressure – help them see it.

Key idea – Hadley Cell

As the air rises, it eventually reaches the atmosphere, forcing air to spread North and South of the equator, unable to return to the equator because of rising air. This is our first introduction to the idea of ‘circulation’ – with the air moving away from the equator, and circulating round to higher latitudes.

As the air moves both North and South, high above the surface, I explain that it is cooling and begins to sink. This sinking takes place as the process of cooling has made the air more dense. Back to the diagram, I add on arrows to show the air sinking at ~30 degrees N+S.

GACM - Air pressure
Building up the diagram – note the additions of cloud and extra annotations.

Depending on curriculum, the visualisation of high pressure at 30~ degrees N+S is an opportunity to recap on deserts. I would finalise this first cell with the knowledge that trade winds carry the sinking air back towards the equator, allowing me to draw an arrow from 30 degrees N/S back towards the equator. This gives students their first completed cell; the Hadley cell.

GACM _ HC
I have my first fully completed cell – if I had more space, I would label rising air as low pressure and sinking air as high pressure.

I would start to get students to move away from attending my notes/teaching and would start to get them applying their own understanding. At this point, this primarily takes the form of a blank diagram of the Earth (with lines of latitude at 30, 60 and 90 added in). I would walk students through what we have learnt thus far – the uneven concentration of insolation across the Earth and the implications of this for air pressure. Whilst I am doing this recap, I would expect students to be adding to their own diagrams – providing a list of key term/prompts on the whiteboard to support. We would now proceed to add in the remaining cells.

Key idea – Ferrel Cell

Bringing the class back together, I revisit my diagram, with the Hadley cell on it, and explain that, at 30 degrees N+S, air is pulled in two directions – some back to the equator, and some northwards by winds known as Westerlies. These Westerlies carry the warm air from 30 degrees up to ~60 degrees North or South. It is at this point, this warm air meets cold polar air, moving to lower latitudes under the influence of polar easterlies. Where these two bodies of air meet – the warm air from 30 degrees N+S and the cold air from the poles – there is a mix, forcing the air to rise (as it is warm and thus less dense). This creates an area of low pressure known as the subpolar low. When we have identified this, as shown below, I ask students to add the Polar cell (the final cell of the tri-cellular model) using all we have covered.

GACM _ FC
Note – I have only completed cells for the Northern hemisphere, deliberately leaving out the polar cell for students to finish/add air pressure.

Conclusion

Like all complicated concepts and ideas, nailing down your explanations and the way you will sequence knowledge, is crucial. Also, plan your questions and how you’ll check for understanding – these elements are essential if students are to overcome misconceptions. A word of advice, as tempting as it is to use a completed diagram/videos, I would strongly urge you to avoid these until students have pieced together the full idea – diagrams and videos make perfect sense to us, as the teacher, as we have a fully developed understanding of the topic. For students, this is much less the case. Finally, (here comes the controversy) I’d cut the gimmicks – 3D models, balloons, paper plates – they all may have a place but first time in, I’d be planning high quality diagrams and precise, concise explanations – don’t overload your students.

This has been a bit of whistle stop tour of ‘How I teach…’ as the GACM is BIG. But, I hope you’ve had a bit of a peek behind the resources/PowerPoints we often see bandied around and seen into the bigger idea of lesson planning.

“How I teach…” Introducing a mini-series

This is the introduction to, what I hope, will form a series of blogs into how I (and hopefully other geography teachers!) teach different elements/topics of geography. I have absolutely loved the recent shift in educational discourse towards big ideas of curriculum, so much of this narrative has helped me elevate my practice. But, I think we need to do more to demystify the lesson-level processes we utilise everyday.

As a trainee, I remember being told to go and watch teacher X because she was brilliant at teaching Y. The problem was, without the opportunity to deconstruct what I’d seen and little/no guidance on the processes behind the lesson, I got very little out of these observations… Whilst no blog will emulate planning with a colleague, watching them teach and then discussing post lesson, I hope that maybe these blogs will help us consider how we teach key geography and share some best practice. Teachers helping teachers!

Leadership matters, but teaching is important too

This academic year saw me move to a new school – within the same MAT – but a change all the same. This isn’t particularly unusual. What is unusual, I think, is the change in role. In my previous role, I had was a HoF (Humanities – covering History, Geography and our version of PSHE) and was serving the second year of an SLT secondment.

This year, I have ‘stepped down’ to be a HoD – leading on Geography. I qualify this (funny I feel I need too?) with the usual caveats – it’s a much bigger school, it’s a much larger department, it’s all about broadening my own experience. However, even with these qualifying factors, I have been questioned by a number of teachers (virtual and otherwise) about my decision to ‘step away’ from leadership. I take issue with this for a number of reasons.

  1. It implies there is little value in teaching

By insisting on this question, it suggests that remaining locked into the classroom is of little importance. It hinges on our ‘leadership obsession’. The narrative being that only with great leadership can teachers possibly achieve great things – to remain in the classroom is to be fearful and unambitious. Andrew Old has spoken eloquently about the importance classroom teachers and their invaluable role in the profession.

2. Demeans the importance of subject specialism

This question makes the assumption (much like point 1) that outstanding school leadership exists purely at senior level and neglects the importance of exceptional middle leadership. Exceptional middle leadership allows valuable conversations around subject disciplines to unfold. It allows schools to create amazing subject communities that produce wonderful learning.

3. Promotes an outdated narrative

I remember watching the amazing Tom Rees talking at ResearchED Blackpool on the idea of a new narrative of leadership. Tom skillfully took down the ideas of ‘hero’ leadership and the meaningless language we often come to associate with leadership roles – and it gave me cause to reflect on my own leadership journey. Truly great leadership is that which empowers classroom teachers to do their very best – not that which seeks to climb high quickly.

4. It sets unreasonable expectations

Teaching is really hard. But, I think, it’s pretty important too. I’d love to be doing it in 40 years (but that’ll depend where the retirement age is by then…) and I don’t think I could if I made a beeline for the next rung of the ladder everytime it appeared. The last couple of years at my old school were enormously rewarding, loved every second and learnt so much. But (and it’s a big one) my workload was enormous and it was taking up a dangerous amount of my time and well being. By stepping “down”, I have already noticed an amazing shift in my workload. I have been truly empowered to focus on that part of the job I love – teaching geography and thinking about geography.

Since drafting this post, I fired off a tweet and I have been heartened by a number of tweeters who have shared their own experience of career progression.

Don’t get me wrong, I am very, very lucky to work in a MAT which is exceptionally well lead. It has allowed me the space to make the non-linear move outlined above, in fact I was supported and encouraged to do so. This gives me faith that, should I wish to pursue progression, I would be supported to do so. But, what’s important here is the fact that we haven’t lost sight of the value of the classroom practitioner. Twitter only serves to reinforce this message to me, some of the best accounts I follow are regular chalkface teachers. Leadership is important, but teacher voice is really magical.

Education offers such a rich variety of opportunity, you’d be a fool to rush and miss it all….


Moving schools? Nobody said it was easy…

If you’ve engaged with me on twitter at all recently, you’ll likely know that this academic year has heralded a change for me – I’ve started a new school.

Here’s the controversial bit – it’s been *really* hard. Nobody ever said it would be so hard. It’s like teaching’s greatest secret!

It’s hard for a whole multitude of reasons: I was at my previous school for 6 years, I was a part of the ‘journey’ to the amazing place it is now, I was completely invested in the Humanities department that now exists – and still feel my place within it, I knew every child and felt such a big part of the community, I made friends there I will never forget. There is a significant emotional toll to moving on, it turns out.

Just why is starting over so hard? It’s my 7th year of teaching, this should be easy?

Well, it’s hard because I don’t know any students. The feeling of impotence that comes from trying to challenge a student and having absolutely no idea who they are – that’s tough. I know very few staff (that said, I have a great team and some colleagues have been gone above and beyond to be helpful) and that can be incredibly lonely. And – in spite of staying within the wider MAT – the protocols and implementation of policy are subtly different. Innumerable times in the past week I have felt the panic inducing fog of cognitive overload! All of this has added up to the toughest week I’ve had in a long while.

It’s like I’ve been stripped of my teaching superpowers. I have been laid low and it’s been a knock.

So, what’s next? A reminder that it’s completely normal to feel lost, to feel alone, to pine for classes/colleagues/experiences past. So, if like me, this new academic year has seen a change of school – I totally get how you feel. I feel it too. There are many, many things I miss about what I have left but I’m trying hard to find the good in every day. September is a peculiar time of year as it is – the loss of summer, the drift towards winter.

Wordsworth, I think, said it best:

“Departing summer hath assumed
An aspect tenderly illumed,
The gentlest look of spring;
That calls from yonder leafy shade
Unfaded, yet prepared to fade,
A timely carolling.”
September, 1819
William Wordsworth
I don’t know when this feeling of uncertainty will fade. But I will take comfort from the fact that I am not alone. And, friend, if this resonated with you, know that you too are not alone.

Changing my mind – Stretch and challenge

Offered a recent Twitter poll on the idea of ‘stretch and challenge’ It’s been fascinating reading through the thoughts of various respondents  – have a look here.

The poll was inspired by a recent CPD session where we discussed the notion of ‘stretch and challenge’. Simply put, ‘stretch and challenge’ exists to take students further in their learning. A student can complete work beyond their current ‘level’ and go further in their knowledge and understanding. In my experience, this is something teachers are encouraged to think about and regularly plan for – every task/lesson/activity should have the opportunity for students to go even further. This sometimes takes the form of an extension/WOW/bonus/challenge and so on.

In the session, we were encouraged to ensure we routinely offered higher order thinking questions and really challenge students. But only when they’d done the main body of the work. Stretch and challenge wasn’t to be for *every* student *all* the time.

Now, here’s the controversial* bit. I don’t agree with this, and don’t really subscribe to the use of stretch and challenge anymore. My thinking around S+C has changed quite radically as I have delved more deeply into theories of learning, cognitive psychology and curriculum planning.

Common approaches to S+C involve setting an activity for students to start on – e.g. in a geography lesson:

1. Describe the distribution of volcanoes around the world

2. Explain the negative environmental impacts of TNC in Nigeria.

Students would go about completing such an activity and, upon completion, may ask the teacher to acknowledge this and seek feedback. Now, given the busy nature of classrooms – it can be hard for the teacher to offer immediate feedback (whether that’s effective may be discussed at a later point…!) and so they may direct the student to the ‘S+C activity’ and seek them out for feedback later. Helps to keep the ‘pace'(???) of the lesson up.

Building on the examples previously used, this may look like the following:

  1. Explain the distribution of volcanoes around the world.
  2. Evaluate the worst environmental impact of those discussed/do the economic benefits outweigh the environmental negatives?

Now, I am not disputing these are valid directions in which to guide students thinking. They make sense – adding further complexity to the learning, deepening knowledge and allowing students to appreciate further subtleties in these areas of study. My issue is the notion that these exist as bolt-ons, or extras – as if they are the preserve of only the most capable students.

By creating additional work in this way it can have two impacts. Firstly, it lowers the bar for some students, it gives them permission to slack off. These questions, aimed to develop and deepen understanding, are not an expectation and so students are not challenged to think hard, they can get by on the minimum. Secondly, it can encourage bad working habits – some students may be so desperate to get onto the S+C that they actually do a pretty poor job of the original task (often the important step in building the foundational knowledge needed) and thus end up with little benefit at all.

So, if I’ve claimed to stop this, what do I do instead?

In approaching a lesson, I will give some thought to who my strongest student is and then, essentially, plan my lesson to make them think *really* hard. I will ensure that there is some real rigour in what I am teaching and try to get them thinking. There are a couple of reasons for this. ‘Teaching to the top’ is important in raising the standard of all students – part of a wider culture of high expectations – and ensures that all students are challenged to produce their best. Secondly, it is much easier to scaffold the rest of my class to the level of my top student than it is to create a S+C/extension task for each individual activity/task in my lesson. 

Naturally, scaffolding to support all students brings a different kind of work and requires a different kind of planning. However, I have found it makes me think hard about what I am teaching and this subsequently means I am better prepared to anticipate and plan for misconceptions. By shifting away from a ‘S+C culture’ to one that focuses on ‘teaching to the top’, it has improved the quality of my teaching noticeably. I take a similarly dim view on the use of ‘differentiated’ learning outcomes – some, most, all etc. and differentiated worksheets/tasks with varied levels of ‘challenge’.

When we create these conditions, we are giving too many students an opportunity to create an unfavourable impression of themselves as learners. “Oh, S+C task, no not for me, I’m bad at geography so never get onto those”

To draw this short post to a close, I think we need to try and move away from the idea of extensions and S+C tasks and reformulate our teaching around high challenge and high support. We should never seek to put a lid on the learning of any of our students.

*may not actually be controversial.